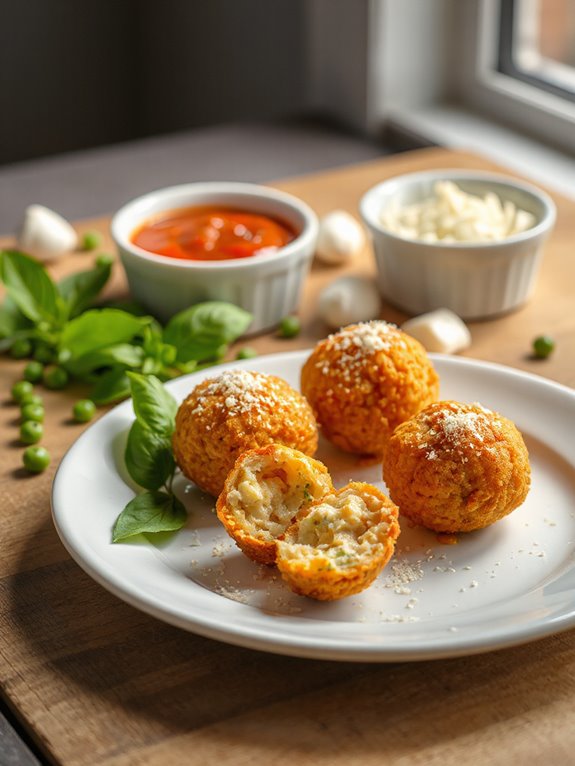
Leftover risotto? Don't let it go to waste!
Transform it into golden, crispy baked arancini balls with this unbelievably simple recipe that's way easier (and healthier!) than frying.
What Is Arancini?

Arancini balls are a fantastic way to transform leftover risotto into something incredibly delicious! They're fundamentally risotto balls that are coated in breadcrumbs and then baked. It's a great way to use up that risotto and get a tasty appetizer or snack. The inside of each arancini is typically filled with a mozzarella cube to add a gooey cheesy center, creating a delightful contrast to the crispy exterior.
Think of it this way: you've got leftover risotto, which would be a waste to throw away, right? I'm taking that and I'm making something even better! You might be asking what's not to love?
Trust me, it is an easy way, even if you are not an Iron Chef. These baked arancini are super easy, and yes, even a complete kitchen newbie can follow my recipe! Are you as ready to start as I think? Let's do it!
Gathering Your Ingredients

Now that you know how awesome they are, let's round up what we need to make them! I'll keep it simple.
First, the star: three cups of leftover risotto! Please make it is cold and stiff – overnight in the fridge is best. Grab one egg – it binds everything. Next, you'll need about a third of a cup of grated cheese, like tasty cheddar – or whatever melts well! Similar to the baked rice recipes, risotto benefits from the addition of good quality broth, too.
I use about a third of a cup of plain breadcrumbs – but wait! You might not need them. It's for thickening the risotto if it's too runny. Don't forget one-and-a-half cups of panko breadcrumbs for that perfect crisp! A half-teaspoon of salt mixes in for flavor. Three tablespoons of olive oil — also essential for crispiness. That's it. We're ready!
How to Make Arancini

Let's get started turning that leftover risotto into golden, crispy balls of deliciousness! First, I combine the risotto with an egg and 1/3 cup of cheese. Mix it well, like you're giving it a good massage.
Now, I preheat my oven to 350F. Grab a baking tray and lightly grease it—we don't want any sticky situations! In a bowl, I combine 1½ cups of panko breadcrumbs with ½ tsp of salt. Then, I add 3 tbsp of olive oil and rub it in with my fingers until it's evenly dispersed. It's kind of like making sandy castles, but tastier.
Next, I make the arancini. I use an ice-cream scooper for consistent sizing, about 1/4 cup each. Drop each ball into the panko mixture, spoon it over, and shape it into an egg or cylinder.
Finally, I place them on the prepared baking tray, standing tall. Bake for 20 to 30 minutes until they're golden brown. Now, let them cool for five minutes before I devour them!
Tips for Perfect Arancini

Those golden, crispy orbs are pretty amazing, aren't they? But getting them *just right*, takes finesse. Let me share a few secrets for arancini perfection!
First: cold risotto is key. Seriously, overnight in the fridge is your best friend here. Warm risotto? Disaster! We want those balls to hold their shape.
Don't skip the test ball! I know, I know, you're anxious to get baking. But trust me, a quick test can save you from arancini puddles. If it collapses, breadcrumbs to the rescue and you're golden!
Get oily fingers—literally! Rub that olive oil into the panko. It's messy, but it's what gives you that amazing golden crust. We're not afraid of a little elbow grease, are we?
Finally, stand 'em tall! Arancini tend to slump while baking. So, shape 'em slightly taller than wide to compensate – it's foolproof. Enjoy!
Short Recipe Version
Baked Arancini Balls Recipe
Prep time: 30 minutes
Cook time: 20 minutes
Serving Size: 6
Ingredients:
- 2 cups leftover risotto
- 1/2 cup grated Parmesan cheese
- 1/4 cup mozzarella, cubed
- 1 cup breadcrumbs
- 2 eggs, beaten
- 1/4 cup olive oil
Instructions:
- Cool risotto completely.
- Mix risotto with Parmesan cheese.
- Form risotto mixture around mozzarella cubes into 1.5-inch balls.
- Dip each ball in beaten eggs, then coat with breadcrumbs.
- Place arancini on a baking sheet, drizzle with olive oil.
- Bake at 400°F (200°C) for 20 minutes, or until golden brown.
Nutrition Information (Per Serving – Estimated):
- Calories: 250
- Protein: 12g
- Fat: 15g
- Carbohydrates: 20g
